

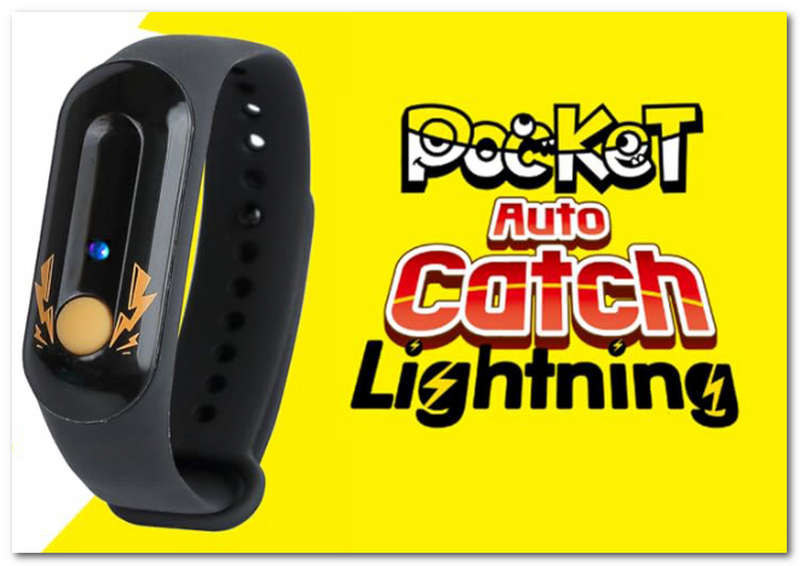
Brook Auto Catch Lightning: Overview, Features, & How-to-Use
Edited by Caroline Ryan | Apr 28, 2025 | Virtual Location
Join the new way of playing Pokemon GO with an auto-catching device, making the life of a Pokemon GO player easier by relying on a device that can auto-catch Pokemon and collect items for them instantly. Other than the auto-catching device created by Pokemon GO, some features appear promising at an affordable cost, such as the introduction of the Brook Auto Catch Lightning, a wristband made for Pokemon GO players for seamless Pokemon catching and auto-collecting of items. As an auto catcher, there is more to it, and reading this guide will ensure you fully understand the Brook Auto Catch Lightning device, its key features, and a step-by-step guide to using the wristband for Pokemon GO gameplay.

Contents:
Part 1. What is Brook Auto Catch Lightning
A wristband device developed by Brook called Auto Catch Lightning is one of those leading auto-catching devices in Pokemon GO, and it is gaining a lot of traction through its functionality. A straightforward device for easily notifying the users that a Pokemon is nearby or an item has been collected almost instantly without pressing any buttons to work.
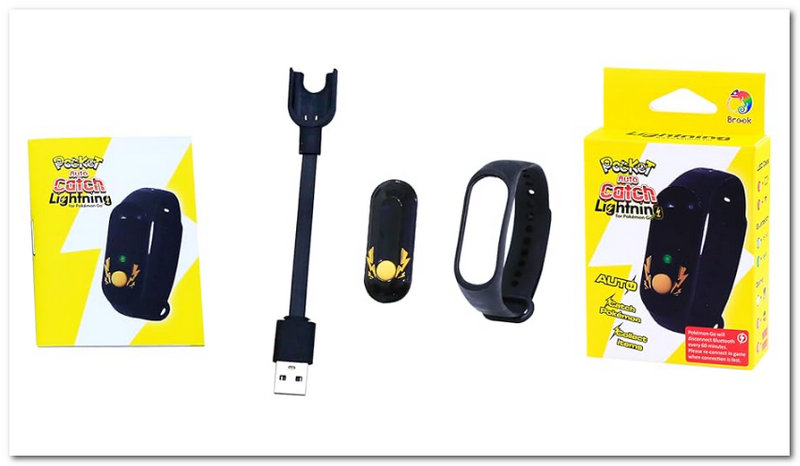
The wristband has a Bluetooth connection that can be detected within a 20-meter radius of your mobile device. Moreover, it is powered by a rechargeable battery that can last about 18 hours of usage. An easy wireless charging cable is included for charging the device, making the hassle of replacing the battery unnecessary. The wristband comes with the Auto Catch Lightning device alongside its accessories, such as a wristband, charging cable, and a user manual to help users with a quick start guide in using the device.
| Operating System Supported | iOS Version 12 and above Android Version 7.0 and above |
| Memory Storage Capacity | 4 GB |
| Connected Accounts | 1 Device |
| Pokemon GO Pokeball Use | Red Balls |
| Notification Indicator | Vibration Feedback LED Lights |
| GPS Support | No |
| Item Weight | 0.28 Ounces |
Part 2. Pros and Cons of Brook Auto Catch Lightning
Now that you have read some basic information about the Brook Pocket Auto Catch review, it's time to consider the pros and cons of using the wristband device for your Pokemon GO gameplay.
Pros
- Lightweight on the user's wrist.
- The main functions are Pokemon GO's auto-catching of Pokemon, spin of PokeStop rewards, and collect items.
- Stable Bluetooth connectivity.
- Feel free to turn ON/OFF the device. Vibration feedback is available anytime.
- Easy to recharge auto-catching tool.
Cons
- It is subjected to failure to connect with Pokemon GO in the user device due to updates of the Pokemon GO app or the user device OS version.
- It is not a Waterproof and Dustproof auto-catcher device.
- There is no means of notifying the user when it is disconnected.
- There is no indicator of battery capacity.
- It doesn't have an application for firmware updates.
Part 3. How to Use Brook Auto Catch Lightning
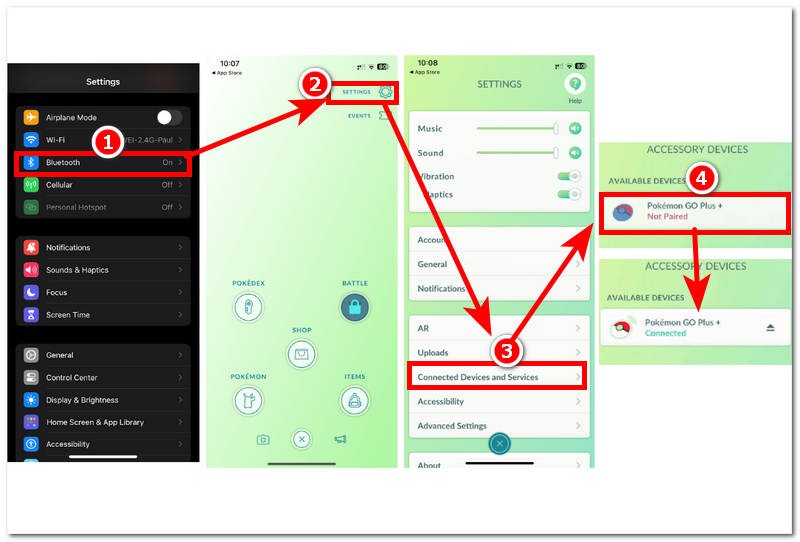
Step 1. To use the Brook Pocket Auto Catch Lightning device in Pokemon GO, you must pair it with your Pokemon GO. To do so, simply follow the navigation: Turn your mobile device Bluetooth ON > Go to your Pokemon GO in-game Settings > Connected Device and Services > Click on the Pokemon GO Plus device to connect the device.
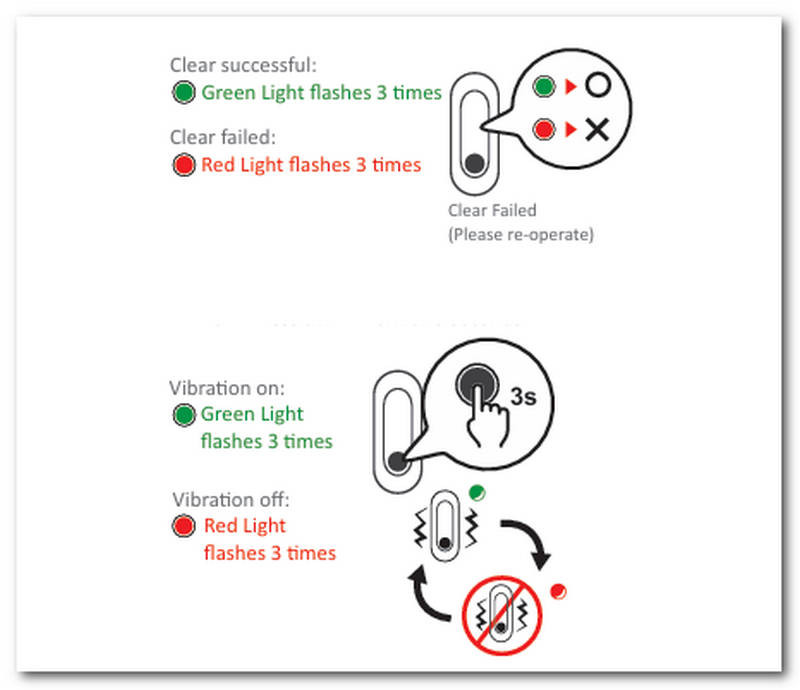
Step 2. Once you have connected your Brook Auto Catch Lightning with your Pokemon GO app. You may switch between two modes by pressing the button on the Auto Catch Lightning. Blue Light is when you want to clear the Bluetooth connectivity, and Green Light is when you want to tweak the Vibration feedback ON/OFF.
Mode 1 - Blue Light: Clear Bluetooth Pairing
Long press the button for about 3 seconds to clear Bluetooth pairing. Once done, when it is successful, it should flash a Green Light three times; otherwise, a Red Light will flash instead.
Mode 2 - Green Light: Vibration Feedback ON/OFF
Press the button for about 3 seconds to turn ON/OFF the vibration feedback. Once you have successfully done this, when it flashes a Green Light, you have turned ON the vibration feedback; otherwise, it will flash a Red Light.
Step 3. To catch Pokemon, spin PokeStop rewards, and collect items in Pokemon GO, you must first complete Steps 1 and 2. Then, you can walk around your area, and the wristband will automatically do its thing.
Part 4. How to Fake Your Location in Pokemon GO
When you want to progress your Pokemon GO game activity at the cost of not using any physical device, you might like using a third-party software, AnyCoord to fake your location in Pokemon GO. It will allow you to use a virtual location to explore different places in Pokemon GO without walking out of your home. Moreover, the tool is capable of helping you earn Adventure Sync rewards and hatch Pokemon GO Egg a lot faster, as the third-party tool will be the one that walks around certain areas for you. It is also can help you fix the Pokemon Go eggs not hatching. Make it undetectable by Pokemon GO, as AnyCoord can also simulate movement to make it feel as if you are walking in the area.
Other functionalities of this third-party software include traveling to different locations across the world to find PokeStops and Gyms and hiding your accurate location information from various services, platforms, and games.
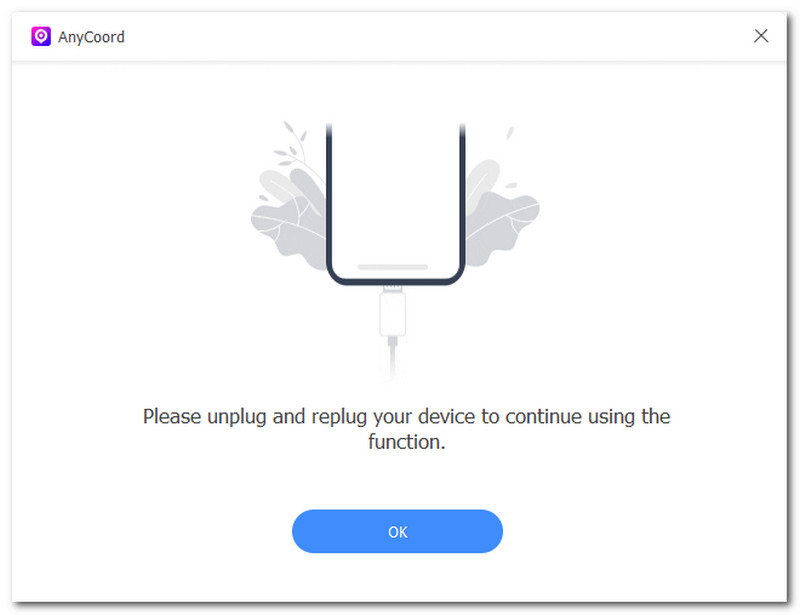
Step 1. Download the AnyCoord software tool on your desktop device (Mac or Windows). Once you have done this, be sure to connect your mobile device to your desktop device via a wired connection before you launch the software.
100% Secure & Clean
100% Secure & Clean
Step 2. Once you have connected your mobile and desktop devices, open AnyCoord software in the virtual location mode available in its user interface and click on the Modify Location option to fake your Pokemon GO locations.
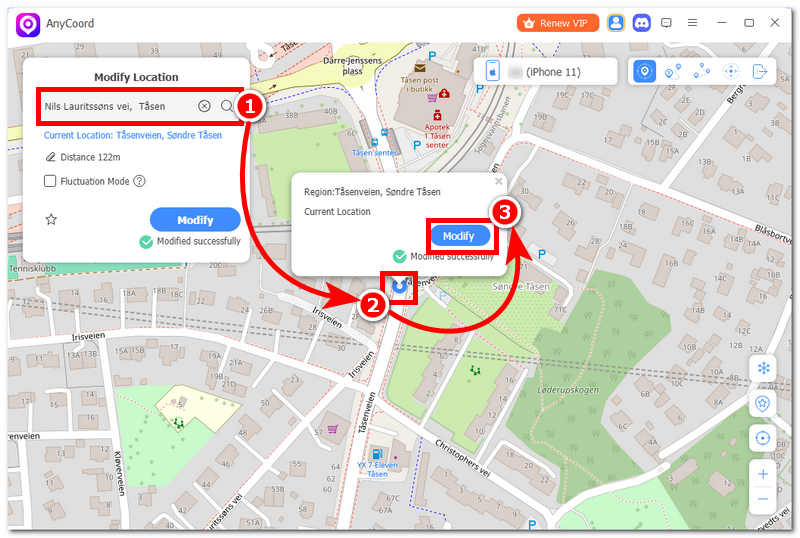
Step 3. Within the chosen mode, use the search bar to find a location where you want to explore/progress your Pokemon GO. Once you have set your location, click on the Modify button to apply the virtual location to your mobile device. Once you open your Pokemon GO, you will see that it uses the virtual location you just set up using the tool.

As you can see, it can help you easily change your current location; try it, and you will never regret it!
Part 5. FAQs about Brook Auto Catch Lightning
-
1How can I reset my Brook Auto Catch Lightning?
You can reset your device by first switching on the Blue Light mode, which clears up your Bluetooth device pairings. After that, press the button until a green light flashes, indicating that you have successfully reset your Brook Auto Catch Lightning.
-
2How do I troubleshoot connection issues?
Suppose you are experiencing connectivity issues when you attempt to pair your Auto Catch Lightning device with your Pokemon GO. In that case, you should close and open your Pokemon GO app or restart your mobile device by shutting it OFF and ON.
-
3Why is my Auto Catch Lightning not responding when plugged in?
When your Brook Auto Catch Lightning does not respond when you plug it in for charging, it may be because the metal endpoints used for charging the device have been covered by dirt. Simply clean them with cotton buds to remove the dirt.
Conclusion
If you are considering Brook Auto Catch Lightning as your Pokemon GO auto-catching device, then this guide is for you. We will review Brook Auto Catch Lightning, starting with its overview, pros, and cons, and then moving on to steps for utilizing the tool. Through this guide, you will know for sure if it is wiser to use the wristband device for its simplicity or just a software tool with a different set of functions to progress your Pokemon GO gameplay.

AnyCoord is the best tool to change, hide, or spoof your location in games, social media apps, and other apps on iPhone or Android devices.
100% Secure & Clean
100% Secure & Clean