A Step-By-Step Tutorial on How to Use iSpoofer in Pokémon Go
For Pokémon Go players, location matters. Trying to find an easy way to catch rare Pokémon, participate in specific raids, or reach PokéStops and Gyms that are out of your physical reach? iSpoofer can change your location, and it can be a virtual game-changer. That’s where tools like iSpoofer come into play. iSpoofer allows you to manipulate your GPS location, enabling you to explore different parts of the world without ever leaving your home.
But how exactly does iSpoofer work, and how can you use it effectively without Niantic penalizing it? In this guide, we’ll walk you through everything you need to know about how to use iSpoofer in Pokémon Go. From installation to tips on how to avoid soft bans, I’ll share the steps you need to follow to spoof your location safely and maximize your in-game experience. Ready to catch ‘em all from anywhere in the world? Let’s dive in.

Contents:
Part 1. Is iSpoofer Still Available Today
Yes. In 2020, iSpoofer, one of the most popular location spoofing tools for Pokémon Go, was taken down due to increased scrutiny from Niantic, the developers of Pokémon Go. Niantic has always maintained a strict policy against GPS spoofing, as it gives players an unfair advantage in the game. Consequently, many spoofing apps, including iSpoofer, faced legal challenges and were eventually shut down.
While iSpoofer was once banned, its development team claims to take it back online in 2024. Meanwhile, it’s important to note that even though iSpoofer is now operational, using such tools came with significant risks, including soft bans or permanent account suspensions from Niantic.
If you’re considering GPS spoofing today, knowing the risks is crucial. While other spoofing tools like AnyCoord are available, Niantic continues to monitor and penalize players who violate their terms of service. Therefore, if you’re looking for alternatives to iSpoofer, make sure to use them cautiously and understand the potential consequences before proceeding.
Part 2. Where and How to Download it
Step 1. Go to their official web by searching “iSpoofer” and download it.

Step 2. Launch the installer and follow its instructions to install.
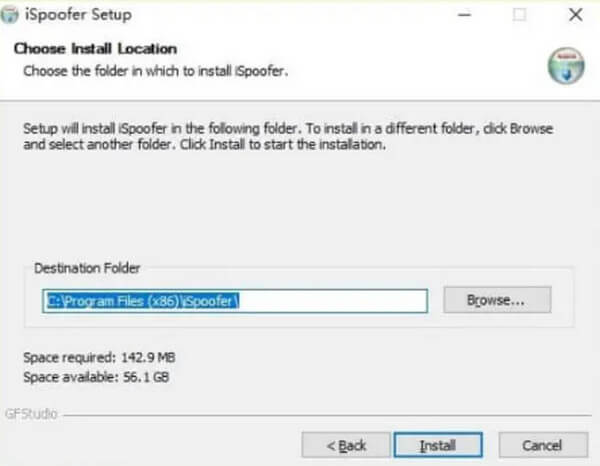
Step 3. What’s more, be aware that this app requires iTunes. If it does not exist on your PC, a window will appear to let you install iTunes first.
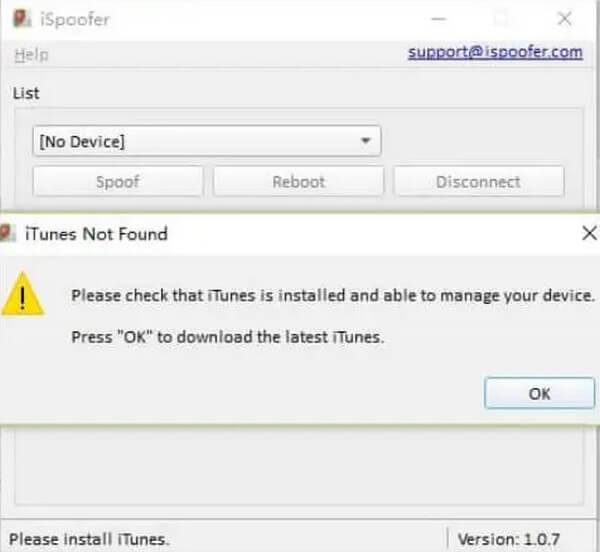
Part 3. How to Use iSpoofer in Pokémon Go
Step 1. Once installed, connect your devices to your PC via a USB cable. Wait for seconds, and you will find that your device is automatically detected by iSpoofer.
Step 2. Afterward, you can select a location by entering a place on the upper left or clicking a place on the map and selecting “Move”. As Pokémon Go shares the same location data with the device, the former location will also be changed.

Part 4. Tips: How to Use It While Avoiding Being Banned
• Respect Cooldown Times
One of the most critical rules in location spoofing is observing cooldown times. Cooldown refers to the time you must wait after performing an in-game action (such as catching a Pokémon or spinning a PokéStop) before teleporting to a new location. The cooldown time is based on the distance between the two locations. For example, if you teleport from New York to Tokyo, wait several hours before interacting with the game again to avoid suspicion.
• Avoid Drastic Teleports
Teleporting across large distances in a short amount of time is a red flag for Niantic’s detection system. To avoid this, try to limit how far you teleport at once. If you need to move long distances, consider doing it gradually over time, as this will look more natural to the game’s servers.
• Use a VPN with Spoofing
A VPN and a GPS spoofing tool can provide extra security by masking your IP address. This makes it more difficult for Niantic to detect inconsistencies between your device’s GPS location and your IP address, reducing the likelihood of being flagged.
Part 5. Another Safer Option - AnyCoord
Given that iSpoofer is currently available, using such tools always carries the risk of bans. Thus, a safer and more reliable option for GPS manipulation might be AnyCoord. Unlike iSpoofer, which was shut down and posed significant risks of detection by Niantic, AnyCoord offers a more secure and flexible way to spoof your location in Pokémon Go without drawing as much attention to your movements.
AnyCoord allows users to change their GPS location and simulate natural movement along custom routes. This provides a more realistic approach to location spoofing. Additionally, it offers advanced features like adjustable walking speeds and the ability to pause movement, making it harder for Niantic’s detection system to flag suspicious activity.
Furthermore, AnyCoord is regularly updated and keeps up with current anti-spoofing measures, which reduces the chances of being banned. For players looking to explore different locations in Pokémon Go while prioritizing safety, AnyCoord is a reliable alternative to iSpoofer that offers a more cautious and secure experience.
100% Secure & Clean
100% Secure & Clean
Features
• AR games Spoofing is available
• Adapted social and dating apps like Hinge
• Joystick, multi-stop mode, etc., are offered
• A keyboard movement control is offered
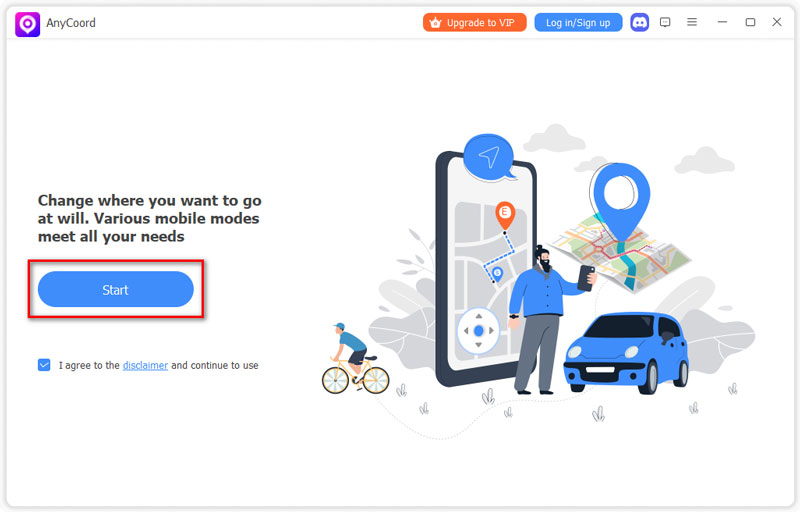
Step 1. Lunch AnyCoord and use a USB cable to connect your devices to your PC. Then, click “Start”. Meanwhile, you should be aware of your device, which might appear as a warning message to gain permission. Choose “Trust”.
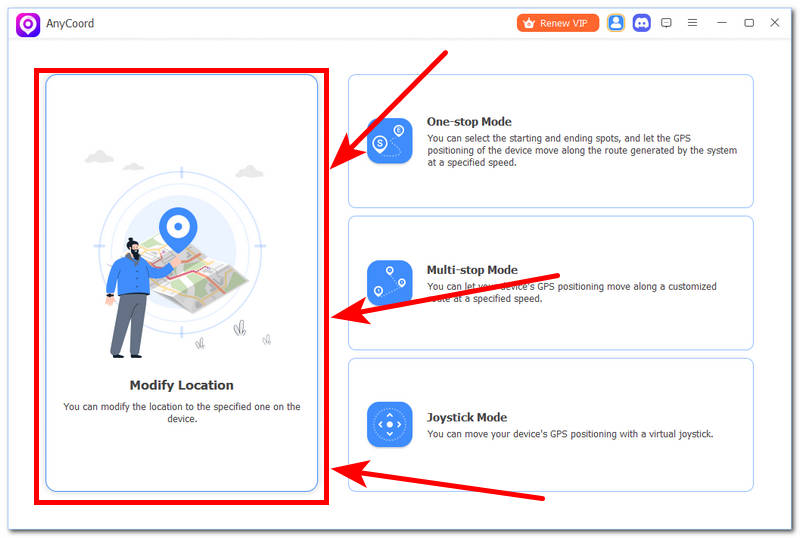
Step 2. Second, click “Modify Location” on the left side.
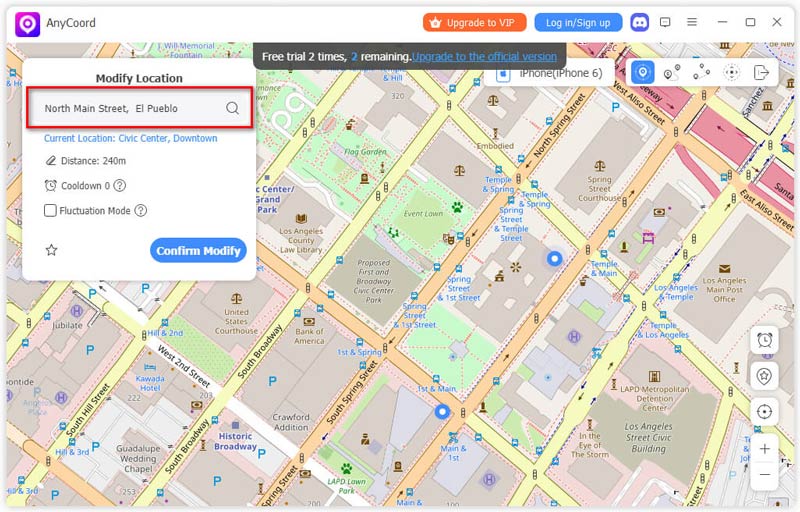
Step 3. Type a location or simply click a place you prefer on the map and choose “Confirm Modify”.
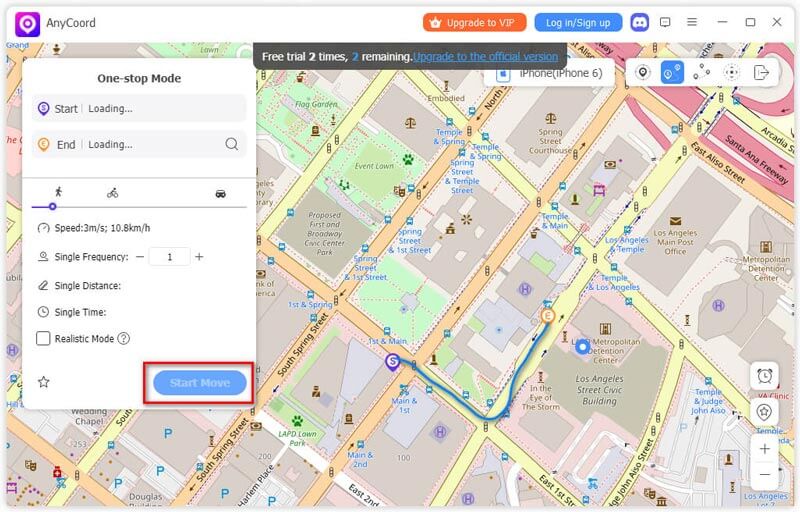
In addition, you can modify the moving speed and route in one-stop mode. When you finish, select “Start Move”.
Conclusion
Well, this is all about our tutorial on how to use iSpoofer in Pokémon Go, and I hope you have found the answer. You can also view more of our articles below. If you have anything that you want to talk to us, don’t hesitate to contact us.


