

How to Change Country on iPhone: 4 Straightforward Ways
Edited by Caroline Ryan | May 20, 2025 | Virtual Location
If you travel a lot, then you may experience the struggle of setting up your Apple Account location. Going to a different country to change your iPhone country may require you to do something before you can change it. This concern is more on the balance, subscriptions, and payment method your Apple Account is associated with. Although switching country is not entirely impossible, attempting to change App Store location without learning about one thing or two will only make your attempt longer. That’s why, by reading this article, you will learn four practical ways to change your Apple account country much quicker and eventually discover the best and safest way you should go.
Contents:
Part 1. Is Changing the App Store Location Possible?
Generally, it is possible to change your iPhone App Store location by default as Apple has its ways of how its users can change it. Instead of traveling just to change their personal Account location, iOS users can use their iPhones to change it and other Apple devices. But if you are curious why people want to change their App Store country, then we have listed some answers below:
● Access to location-based games, apps, services, platforms.
● Moving to another country for good.
● Access to location-based content.
● Pricing of subscription fees may be cheaper.
Moreover, Apple has listed some reminders to their users on what to do before they can change the country or region in their device which we listed below for your information.
● Make sure to use your balance in your Apple Account before changing location, as not doing so may lead to your balance losing or just won’t let you change country.
● If you subscribe to a platform or service, it is best to cancel it before you can change the region. This is because certain apps or platforms don’t work in other countries.
● Be sure to have a different payment method working in the new country, as your current payment method may not be available.
● If you are in a Family Sharing, you should leave it as this can cause a problem with the currency difference between the two locations or regions you are traveling to.
● Secure those apps, music, eBooks, or TV shows you might want or need in the future by redownloading them, as not doing so may make them unavailable in the new location.
Part 2. 4 Ways to Change App Store Location
While you have taken notes of the abovementioned reminder of Apple before changing your device country/region, in how to change App Store location, be sure to check each of our listed ways below. We curated various methods using iPhone, Mac, Web Browser, and even a third-party software tool guaranteed to work on all devices.
Use of iPhone
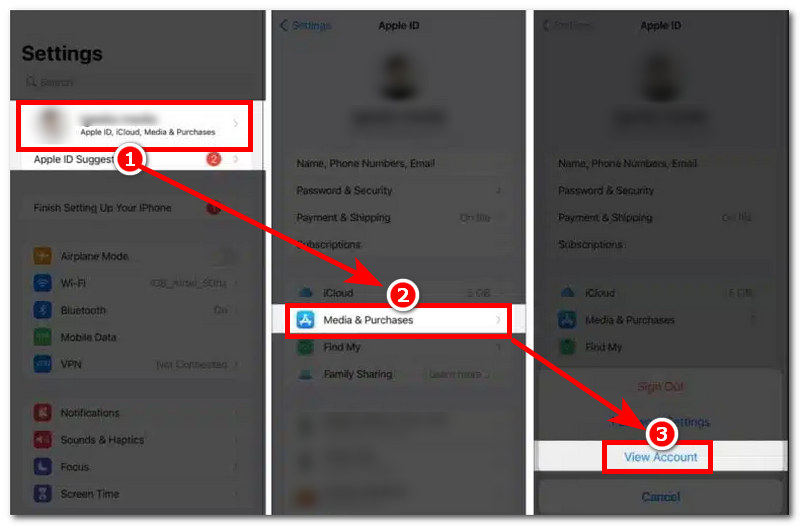
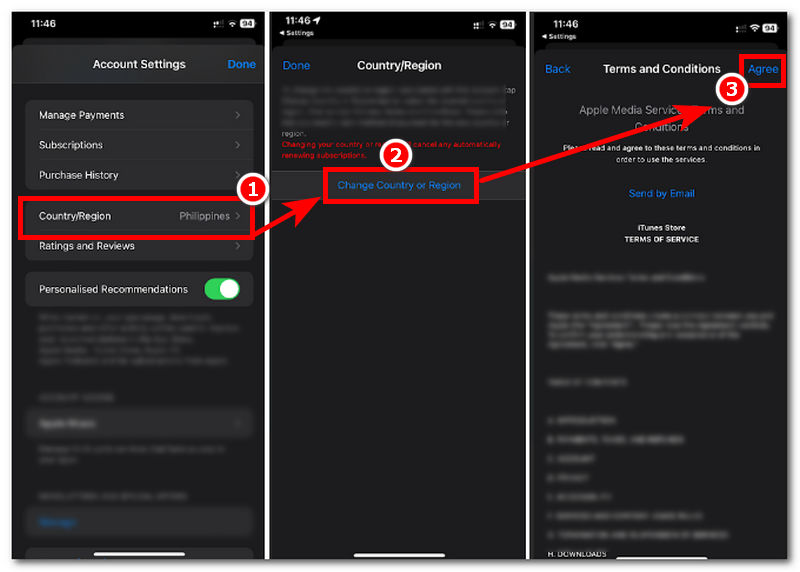
Step 1. Using your iPhone, go to your Settings app and tap on your Apple ID > Media & Purchases > View Account.
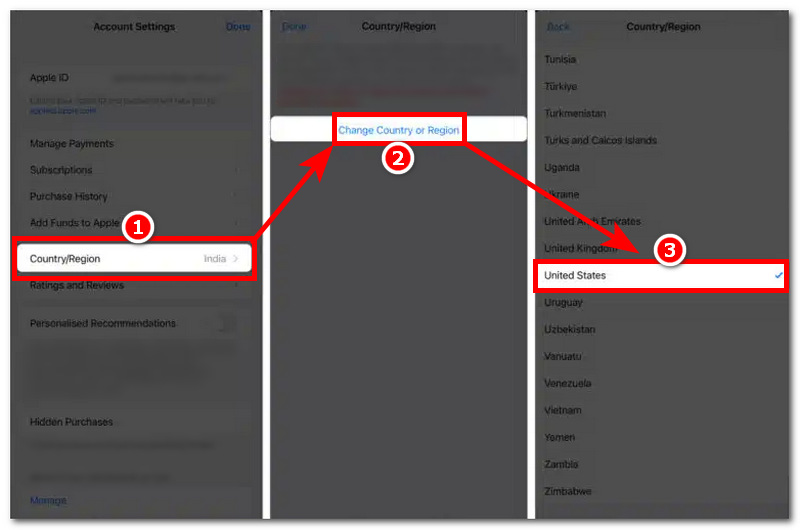
Step 2. Once in your Account Setting, tap on the County/Region > Change County or Region > and Select the Country/Region you want your App Store to use as a new location.
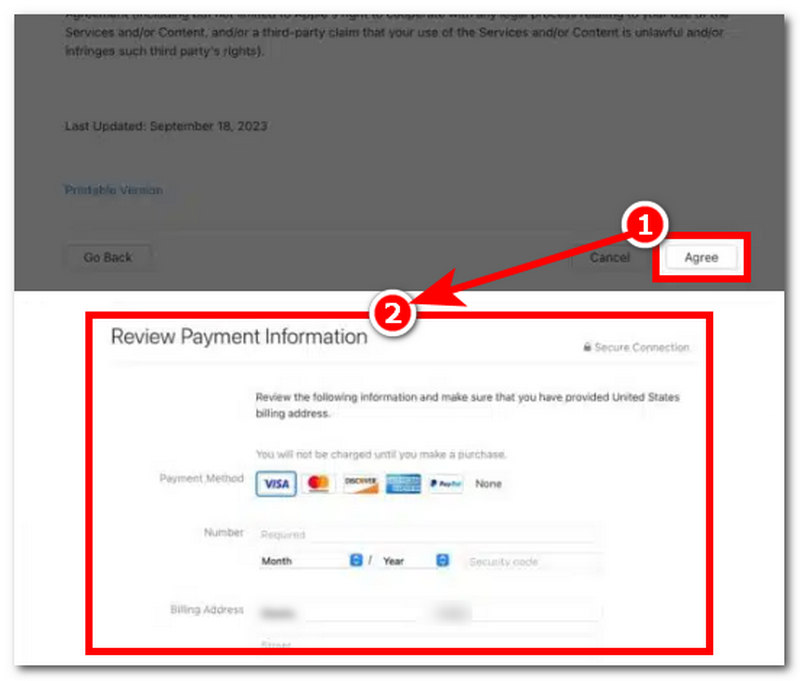
Step 3. You will be redirected to the Terms and Conditions page. Read on it, and once done,e tap the Agree button on the upper-right corner of your screen and add your new billing address and other necessary information. To finish the process, tap the Next button on the upper-right corner of your screen.

This is how to change the App Store country. Try AnyCoord and obtain this powerful but handy tool!
Use of Mac
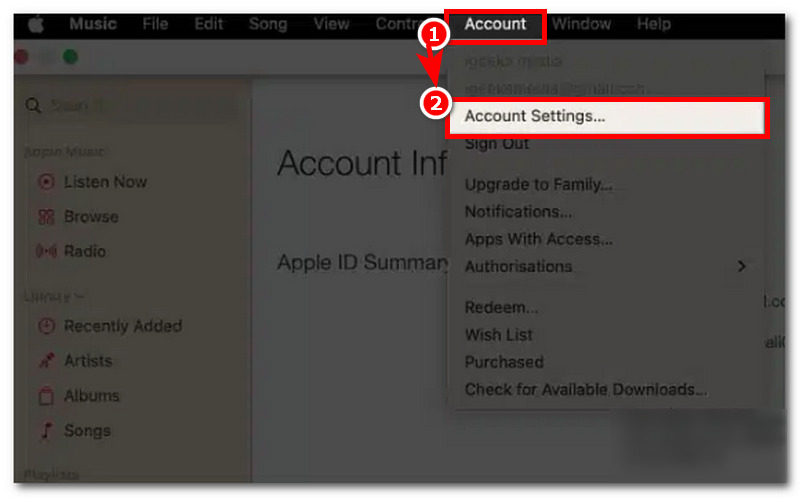
Step 1. Using your Mac device, open your Apple Music App.
Step 2. Within the Apple Music App interface, proceed to click on the Account Settings situated from the above panel of the Music App.
Step 3. To access your Account Information windows, the app may require you to sign in your Apple ID. Once done, in the same setting, click on the Change Country or Region section, and from there, select a new country or region you want to change your App Store location.
Step 4. Proceed to read the Terms & Conditions, and once done, click on the Agree button to proceed with filling out your new payment and billing address. Once done, the latest country should reflect on your account just fine.
Use of Web Browser
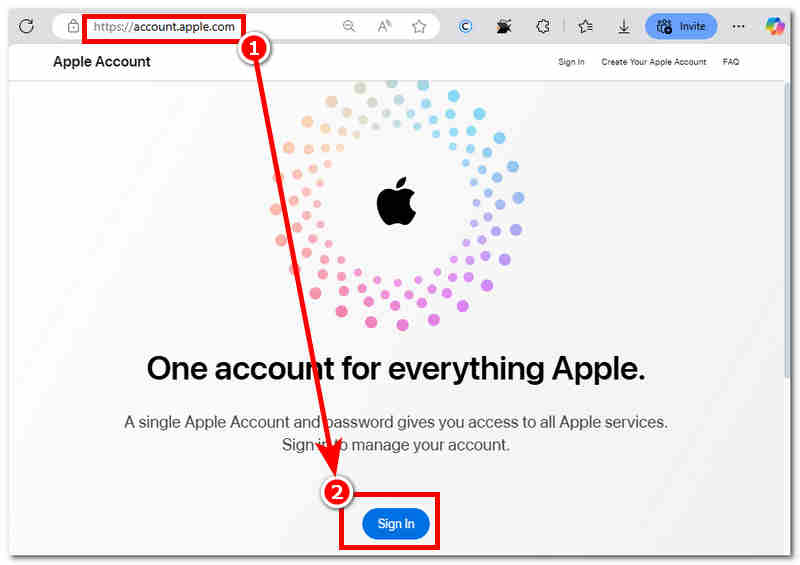
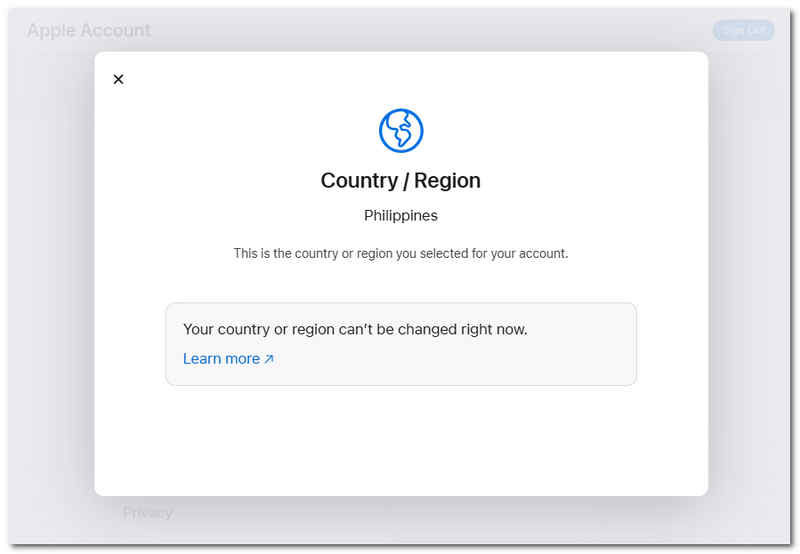
Step 1. Through any of your devices, go to your Web Browser and proceed to sign in to your Apple Account at https://account.apple.com/
Step 2. Once you are logged in, go to your Personal Information.
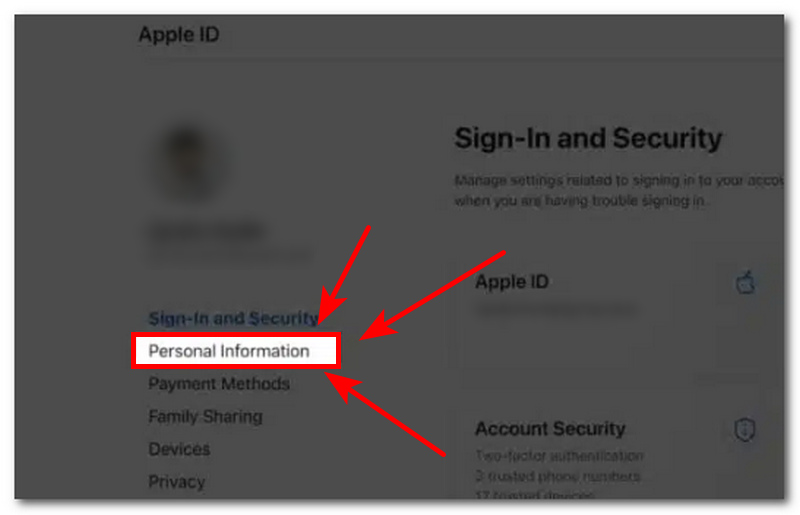
Step 3. Within your Personal Information setting, you can see your account Country/Region. Just click on it to proceed.

Step 4. From there, select the new Country/Region you want your App Store to use and set up a new billing address to finish the process.
Use of Third-Party Software
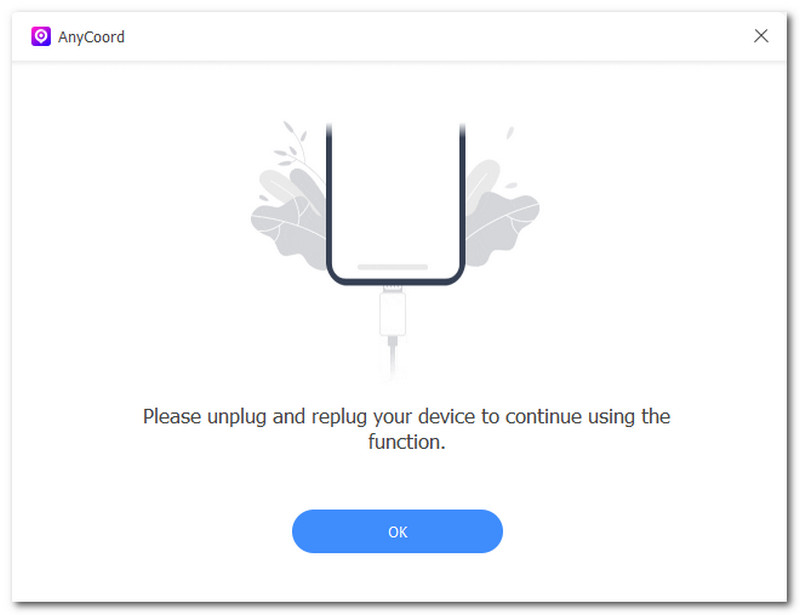
Step 1. Using any of your desktop devices (Mac or Windows), download the AnyCoord software. Once done, before opening the software, connect your iPhone to your desktop via a wired connection.
100% Secure & Clean
100% Secure & Clean
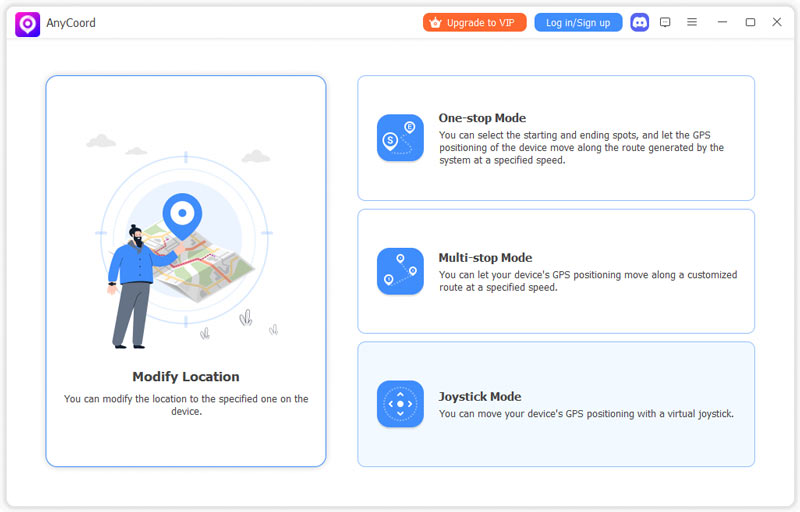
Step 2. After connecting your iPhone, click on the Modify Location option that can be seen from the software’s main interface.
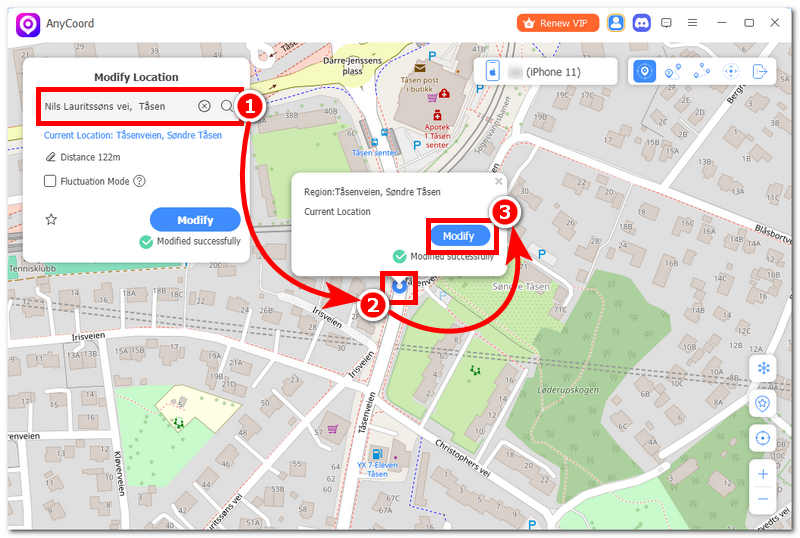
Step 3. Next, to be able to change your App Store location on your iPhone without the need to tweak your Apple Account billing address. Use the search bar field to select the new area you want your App Store to use.
Step 4. After you’ve chosen your new location, click the Modify button to start using it as your newly set up location in your iPhone App Store.
Part 3. Is Changing App Store Location Legal
All of the listed methods above in changing your App Store Location are legal. Hence, you can legally change your App Store location without concerning yourself with the potential risk. If you haven’t noticed, the abovementioned methods are mostly doable as long as you have your Apple devices, Apple ID, and Payment Method prepared.
But If you ask us what is the ideal and best method to change App Store location on iPhone, take advantage of the use of a third-party software, AnyCoord, for such needs. By relying on third-party software, the need to sign in with your Apple ID and fill out a new billing address is not needed, as AnyCoord can simplify the process by instantly allowing its users just to select whichever location or area their user want to use in their App Store as location.
Part 4. FAQs about Changing Country on iPhone
-
1Will my purchased apps and subscriptions work in the new country?
It depends; some apps are just not available in other countries. Thus, not researching about what apps and subscriptions you currently have before going to a different country may lead you to lose access to it.
-
2Can I switch back to my original country later?
Yes, as a user, you have complete control of it, but the catch is that in order for you to switch back to your original country when traveling back, you have to go through the same process as you did when changing it. It can be through your iPhone settings, Mac devices, or Apple Account.
-
3Will I lose my iCloud data or Apple services?
No, changing an App Store location or country does not erase or delete your iCloud data and Apple ID settings. Still, some Apple-developed apps may stop working, or you may lose access, such as Apple News+, as this app is not available in other countries.
-
4Can I change my country without a payment method?
Yes, you can change your country in the App Store without a method as long as you don’t have a balance remaining in your Apple ID, you don’t have an active subscription, and you do not belong in a Family Sharing group, but you can still change your country even if you have it all. Just use third-party software for it, like the AnyCoord, for a more hassle-free process.
Conclusion
Changing the App Store location is a lot easier than you have thought of it. As you just read in this guide, you are presented with four ways to do it effectively and efficiently. One method is for Apple device users, which consists of using an iPhone or Mac device, and the other is for the non-Apple user who uses any preferred web browsers and third-party software that caters to all devices.
Moreover, if you can’t decide which method is best to use, you can start supposedly by using third-party software like AnyCood. In that case, as this method offers the quickest way to do it as it does not need a user Apple ID account and have them fill out a new billing address and method, which by setting it up alone can also take time.


AnyCoord is the best tool to change, hide, or spoof your location in games, social media apps, and other apps on iPhone or Android devices.
100% Secure & Clean
100% Secure & Clean